








Composting is a simple way to turn everyday food scraps and yard waste into a useful soil amendment. Instead of sending organic waste to the trash, you can let it break down naturally and use the finished compost in gardens, containers, and flower beds.
Starting a compost pile may seem complicated, but beginners only need a suitable container, the right mix of materials, and a little patience. This guide covers the basics to help you build a healthy compost system at home.
What Is Composting?
Composting is the natural process of decomposing organic materials into a dark, crumbly material called compost. Microorganisms, insects, worms, air, and moisture all help break down the ingredients.
Finished compost can improve soil structure, help the soil hold moisture, and provide nutrients for plants. It is sometimes called “black gold” because of its rich appearance and value in the garden.
Composting can be done in a backyard bin, a tumbler, a small indoor container, or a worm bin. The best method depends on your available space, the amount of organic waste you produce, and how much effort you want to spend.
Choose a Composting Method
Before collecting materials, choose a setup that fits your home.
Outdoor Compost Bin
A basic outdoor bin is a practical option for homes with a yard. You can purchase a commercial bin or build one from untreated wood or wire mesh. The bin should allow air to circulate and make it easy to add materials and remove finished compost.
Place it on bare soil when possible. This gives worms and other helpful organisms access to the pile and allows excess moisture to drain.
Compost Tumbler
A compost tumbler is a sealed container that rotates on a frame. Turning the container is usually easier than mixing a traditional pile with a fork. Tumblers can produce compost relatively quickly, although they may hold less material and can be more expensive.
Worm Bin
Worm composting, also called vermicomposting, works well for apartments and small spaces. Special composting worms process fruit and vegetable scraps inside a ventilated container.
Worm bins need protection from extreme temperatures and should not be overloaded. They can be kept indoors, in a basement, or in a shaded outdoor area.
Kitchen Scrap Collection
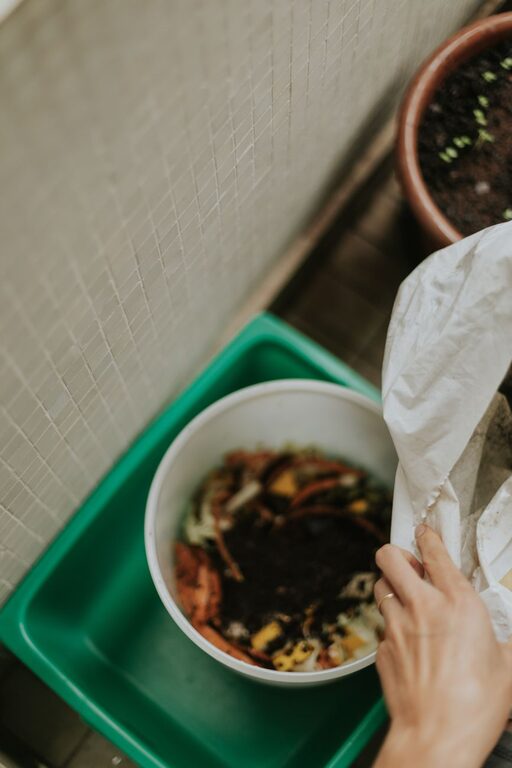
Even if you do not have an outdoor compost system yet, you can collect food scraps in a small container. Choose one with a lid and empty it regularly to prevent odors. Store it under the sink, in a pantry, or in another convenient location.
Learn the Two Main Types of Materials
A healthy compost pile needs a balance of “green” and “brown” materials.
Green Materials
Green materials are generally rich in nitrogen. They help heat the pile and support decomposition. Common examples include:
– Fruit and vegetable scraps
– Coffee grounds and paper coffee filters
– Fresh grass clippings
– Fresh leaves
– Plant trimmings
– Crushed eggshells
Brown Materials
Brown materials are generally rich in carbon. They provide structure and help keep the pile from becoming too wet or compacted. Examples include:
– Dry leaves
– Small twigs
– Shredded plain cardboard
– Uncoated paper
– Paper egg cartons
– Untreated sawdust
– Straw
A common beginner mistake is adding too many food scraps at once. If the pile becomes wet or smells unpleasant, add more dry brown materials and mix them in.
Use the Right Balance
You do not need to measure every ingredient precisely, but a rough balance helps the pile work properly. Aim for about two to three parts brown materials for every one part green material by volume.
Try layering materials as you build the pile. Start with a layer of coarse brown materials, such as small branches or dry leaves. Add green materials, then cover them with another layer of brown material.
This approach helps control odors, improve airflow, and discourage pests. If you add a large amount of food waste, cover it completely with dry leaves, shredded cardboard, or another brown material.
Prepare Materials Before Adding Them
Smaller pieces break down faster than large ones. Chop fruit and vegetable scraps into smaller pieces, shred cardboard, and break up large branches before adding them to the pile.
Avoid adding thick layers of one material. For example, a deep layer of grass clippings can become compacted and slimy. Mix grass with dry leaves, shredded paper, or small twigs to improve airflow.
Moisture is also important. Compost should feel about as damp as a wrung-out sponge. If it is too dry, add a small amount of water and mix the pile. If it is too wet, add dry brown materials and turn it to increase ventilation.
What You Can Compost
Many common household and yard materials can go into a backyard compost pile, including:
– Fruit and vegetable scraps
– Coffee grounds and paper filters
– Tea leaves and some plain tea bags
– Crushed eggshells
– Yard trimmings
– Dry leaves
– Untreated wood chips
– Plain shredded paper
– Uncoated cardboard
– Natural plant fibers
Check tea bags before adding them. Some contain plastic fibers that do not break down easily. Remove staples, labels, tape, and other noncompostable parts from paper products.
What to Avoid
Some materials can attract pests, create odors, or introduce unwanted substances. Do not add these items to a basic home compost pile:
– Meat, fish, and bones
– Dairy products
– Oils and greasy foods
– Pet waste
– Diseased plants
– Weeds with mature seeds
– Coal or charcoal ash
– Glossy or heavily coated paper
– Treated wood
– Plastic, glass, or metal
Some specialized composting systems can handle materials that a standard backyard pile cannot. Follow the instructions for your chosen system, especially if you are using a worm bin or a city collection service.
Turn the Compost Regularly
Turning the pile mixes the materials, adds oxygen, and helps distribute moisture. Use a garden fork or compost aerator to move the outer materials toward the center.
For a traditional backyard pile, turning it every one to two weeks is a useful starting point. You do not need to follow a strict schedule. Turn the pile when it appears compacted, wet, or slow to break down.
Compost tumblers may need more frequent rotation, depending on the instructions from the manufacturer. Avoid turning too aggressively if the pile is very wet, as this can make it harder to maintain the right texture.
Solve Common Composting Problems
Bad Odor
A strong rotten smell often means the pile is too wet or lacks air. Add dry brown materials and turn the pile thoroughly. Bury fresh food scraps in the center rather than leaving them on top.
Compost Is Too Dry
A dry pile may break down slowly. Add a small amount of water while mixing. You can also add fresh green materials, but avoid adding too much at once.
The Pile Is Not Heating Up
A small pile may not become noticeably warm. Add more materials, improve the balance of green and brown ingredients, and keep the pile moist. Chopping materials into smaller pieces can also help.
Pests Are Appearing
Cover food scraps with a thick layer of brown material. Use a secure lid, avoid meat and dairy, and make sure the compost bin is not overflowing. A properly managed pile should have an earthy smell rather than a strong food odor.
Know When Compost Is Ready
Finished compost is usually dark brown, crumbly, and earthy-smelling. You should not be able to recognize most of the original materials, although small pieces of twigs or eggshells may remain.
Depending on the materials, weather, and method, compost can take several months or longer to finish. Let it continue breaking down if it still looks wet, stringy, or recognizable.
Use finished compost by mixing a thin layer into garden soil, adding it around established plants, or blending it into potting mixes. Avoid using unfinished compost directly around young plants because it may compete with them for nutrients.
Start Small and Stay Consistent
The easiest way to begin composting is to start with a manageable system. Collect food scraps, save dry leaves or shredded cardboard, and add materials gradually. A small, well-maintained pile is more useful than a large pile that is difficult to manage.
Composting is a learning process. Pay attention to moisture, smell, texture, and the speed of decomposition. With a balanced mix of materials and regular care, your household scraps can become a valuable resource for healthier soil and a more productive garden.